Home Recording for guitarists is now as easy as it has ever been, all you have to do to get started is: get yourself an Audio Interface, take your Laptop and install a DAW (Digital Audio Workstation) on it (like Cubase, Pro Tools, Logic etc...), and then you can connect your guitar to your interface and start recording.
It's really that simple! But it wasn't always like this...
Imagine a world where you had to go to an expensive professional studio to record music, a world with no computers, a world where songs were recorded on tape (picture the inside of a cassette tape…if you can) and because of that, if you wanted to fix or change something within a performance, you had to physically cut and paste the tape…sounds like ancient history right?
Believe it or not this was the only way in which music could be recorded until not so long ago.
Luckily for us technology has advanced a lot since then, and music recording techniques changed drastically as a result, to the point where commercially successful albums can be made using only a single laptop, one microphone and perhaps some sort of MIDI (Musical Instrument Digital Interface) controllable instrument, like an inexpensive keyboard.
Think about Billie Eilish…I know that this is a guitar website, but hear me out…her debut album “When We All Fall Asleep, Where Do We Go?” (released in 2019) won her 6 Grammy Awards in 2020, including Best Album and Best Song.
Did you know that most songs on that album were recorded and produced in a bedroom by FINNEAS (Billie’s brother) using only a Mac Computer with Logic (Apple’s own DAW) and one Audio-Technica AT2020 (about $150) microphone?
Now, of course talent and good songs played a huge part in her success, but it’s because of this kind of stories that it is definitely undeniable that Home Recording is now a certified reality, even when it comes to professional artists and musicians.
Now that you have some understanding of the unbelievable power of modern Home Recording technologies we can start talking about what that means for us as guitar players.
Nowadays there are so many options available for recording good quality guitar tracks at home, but you basically have to understand that there are mainly two different schools of thought: you could choose to go the old school way and use one or multiple microphones to record your guitar amplifier, or you could do what the kids are doing and use some sort of amp simulation software or hardware, but there are some pieces of gear you absolutely need to have regardless of which option you’ll choose to go with.
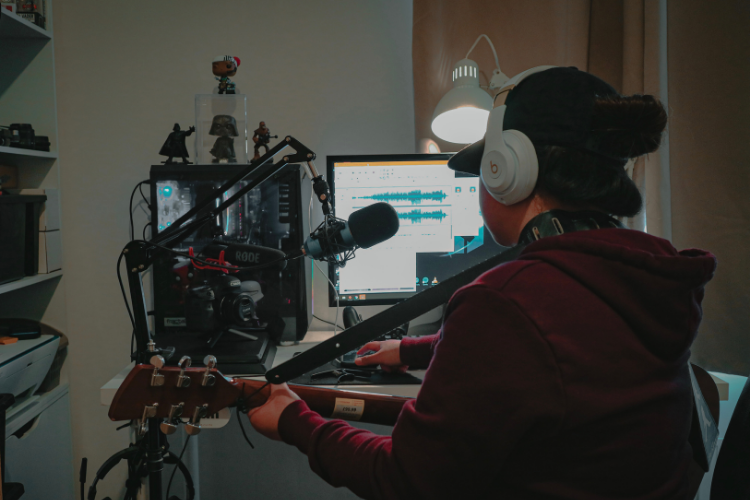
Computers are the beating heart of any recording setup, whether that’s a home studio or a more professional environment, the computer you choose to use for recording must be at the center of it.
You can use either a laptop or a desktop computer, it really doesn't make a significant difference. As a matter of fact you might even use your iPad or your smartphone.
Let me paint you the picture of the pros and cons of the three main different options you have, but bare in mind that it all depends on the combination of the different softwares and hardwares you’ll use, it’s not just the computer, but anyway, you can choose to go with:
This is traditionally the most durable and reliable option. Desktop computers tend to be more powerful than laptops, and obviously more powerful than iPads/Smartphones. They’re able to handle a bigger workload, so that means more apps open and less unwanted crashes because of that.
I feel pretty confident in saying that this is definitely the most popular option, it’s what I've seen used by the majority of the professional musicians and producers I know and it’s also what I use.
Laptops might generally be less powerful than desktop computers, but in most cases the difference is not even noticeable and you’ll definitely benefit in portability.
This is clearly the cheapest option because you probably already have one or both of these devices, it's obviously the clear winner in the portability contest, but it’s also the least powerful option.
On top of that you’ll definitely experience less software availability and you will need additional dedicated hardware like the IK Multimedia iRig
(https://www.ikmultimedia.com/products/irig2/) to connect your guitar to your iPad or Smartphone.
So, do you need to spend thousands of your hard-earned dollars on a computer for your home studio? Absolutely not, you don’t have to…unless you feel like you need it!

Have you ever wondered how come a computer is able to reproduce sound? I mean, computers are digital devices, and that means that everything they can “understand” has to be some kind of series of zeros and ones, definitely not music as we hear it!
I’m only a musician, not an engineer, so forgive me if that’s not an accurate depiction, but what I’m trying to say is that sound is naturally an analog signal and in order to be received by a computer it needs to be converted into a digital signal, which is then converted back to analog once again so that we can hear it.
Also, this has to happen in real time, with the least amount of delay.
How is this magic possible you ask? Well, let me introduce you to the wonders of the Audio Interface.
These devices are equipped with ADC (Analog to Digital Converter) and DAC (Digital to Analog Converter) which enable the back and forth conversion that is necessary for recording music (analog signal) into a computer (digital platform).
As you can imagine the quality of these converters can drastically increase or decrease the price of said devices, but this is not the only component you’ll find inside your audio interface.
Microphone Preamps are also a very important factor to consider when buying an interface. Preamps basically amplify the audio signal that goes through them, which is naturally not loud enough and therefore needs to be raised in volume.
During the process of sound amplification preamps usually add "color and character" to the sound. Different styles of preamps are used in different genres of music, just like it happens with certain guitars, amps or pedals.
Anyway, you can generally choose how many preamps you want in your interface and how qualitatively good you want them, all for a price of course. Why would you ever need more than one preamp if all you want to do is recording guitar?
Well, you might want to record guitar and vocals at the same time, like for a singer-songwriter kind of vibe, or maybe it’s just one acoustic guitar, but you want to use multiple microphones in different positions around it to capture the different sounds and nuances of your performance.
If you want to feed the signal coming from your guitar (or bass) directly into your interface you will probably need to plug in the Line Inputs.
These do not provide the same kind of audio signal amplification as a mic preamp, simply because it’s not needed for electric guitars and other kind of instruments, like synths for example.
In many cases line and mic preamp channels are shared, and that means that you’ll likely find one “hole” that’s going to accept a 1/4 inch jack style connector (for your guitar) and an XLR connector (for microphones), but not at the same time, you’ll need to use two different input slots for that.
For guitar and bass you definitely need to consider buying an interface that has an Hi-Z Input, which has higher impedance, making it ideal for instruments that use pickups, just like electric guitars. Some audio interfaces will have a separate Hi-Z channel, while others use a switch that activates the same function.
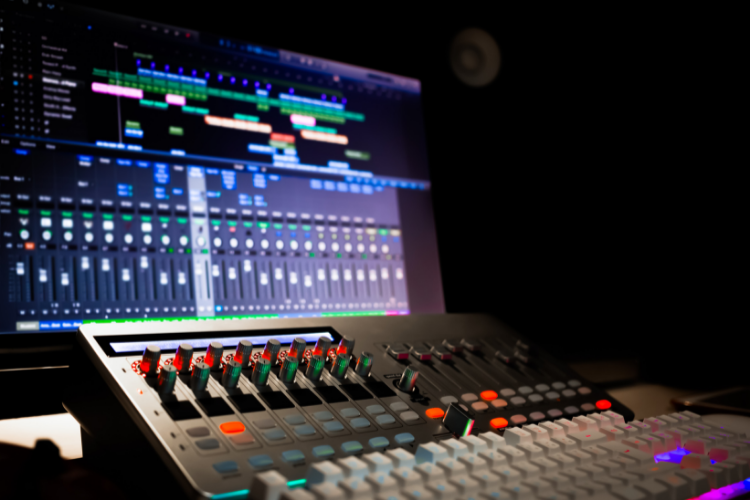
Now that I have covered the hardware essentials, let’s take a look at what you’re gonna need on the software side of things. The one piece of software that you absolutely need to have is a DAW, which you can think of like the virtual equivalent of an entire old school recording studio.
Within your DAW of choice you’re going to record, edit, mix and potentially master all of your music, so it goes without saying that it’s one of the most important elements of the recording process.
There’s a huge number of DAW softwares available on the market, some of them are free but most need to be paid for. They are all different when you consider the general workflow that the platform suggests using, but don’t get confused: every DAW does the exact same things...just not in the same way!
The first time you’ll open one of these softwares there’s a good chance that you will be overwhelmed by the astounding amount of buttons, tracks, mixing tools etc…but it only takes a little experimenting before you start to understand what you actually need, because let’s be honest: unless you want to become a mixing engineer, you don’t need to know all the ins and outs of your DAW, as I said you just need to experiment and you’ll soon figure out your real needs.
Let me briefly talk to you about some of the most popular options on the market: the “industry standard” has to be Pro Tools (https://www.avid.com/pro-tools), which is considered to be the best DAW for audio recording and editing, mainly made for engineers, but musicians and producers use it a lot as well.
See how Pro Tools compare to
Then there are Cubase (https://www.steinberg.net/cubase/) and Logic Pro (https://www.apple.com/it/logic-pro/) which I have always seen as very similar, because they both do a bit of everything!
I personally use Logic Pro, which only works on Apple devices (the software itself is owned by Apple), but when I used to record music on Windows computers I was a Cubase user, and switching to Logic wasn’t hard at all even if I had learnt how to record music using Cubase.
There’s Ableton Live (https://www.ableton.com/en/live/) which is famous for electronic music production because of all the easy ways in which you can manipulate and transform sounds, but, as the name suggests, it is also very used for live (loop based) performances.
All of the above mentioned softwares are not free, and I’m actually really sorry to tell you that all free DAWs usually come with some limitations compared to the paid ones, but if you don’t want to invest in a DAW right away I’m gonna list three of the most popular free recording softwares available:
Before I move on to guitar-only subjects let me tell you that it is very common to find Audio Interfaces sold in bundles with DAWs. Most of the times these are usually limited versions of the full softwares, but these offers will still save you some money and I think this is a very efficient way to kill two birds with one stone.
Also, some audio interface manufacturers have their own DAWs, which are usually free when you buy their hardware products (Universal Audio and PreSonus are the firsts that come to mind), so keep your eyes open for these bundles.
As I mentioned before there are two very different techniques for electric guitar recording, they both have their pros and cons, and nowadays it feels like some kind of battle between tradition and technology.
I’m obviously talking about capturing the sound of a real guitar amp in the old school way, so with one or more microphones in front of the cabinet speakers, versus using some sort of guitar amp simulation hardware or software.

The legendary players that crafted all of our favorite guitar riffs and solos have one thing in common: they all used high wattage amps, cranked to ear blasting volume, and let’s be real…that’s the sound of greatness! In the beginning even distortion (overdrive, fuzz etc…) wasn’t easy to get, you could only achieve that sound by getting your amp to “go to 11”, and that means loudness.
Jimi Hendrix, George Harrison, Eric Clapton, Jimmy Page, Brian May, BB King, Eddie Van Halen…you name it. The history of Rock and Blues music would have been very different if these amazing players wouldn’t have had the guts to run the risk of deafness with the goal of eternal glory.
If you want to follow the footsteps of the greats of the past (and present) you need to get yourself the most used microphone for electric guitar recording: the Shure SM57
(https://www.shure.com/en-MEA/products/microphones/sm57).
Realistically if you have ever heard any music that had electric guitar in it, chances are that it was recorded using this mic, and that’s actually super cool considering that it is kind of cheap (about $100).
So you’ve got your SM57, what do you do next? You have to place it in front of your speaker using a mic stand. How and where exactly?
Well, you might be interested in knowing that there are professionals whose entire careers are based on being good (and fast) at doing this sort of stuff, because you can move your mic an inch and the sound will drastically change.
In general think of it like this: when the mic is placed in the center of the speaker you’ll get all of the high and high-mid frequencies, on the other hand, if you place the mic closer to the edge of the speaker you’ll get a darker sound, so more bass end and low-mid frequencies.
You want to find a good balance between these two extremes, after that it’s only a matter of taste.
Ok, so I placed my mic, what now? You have to connect it to one of the preamp channels on your Audio Interface using an XLR cable. Remember when I told you how important preamps can be? Well, you’ll notice that during this stage of the process!
Then you have to check if you are clipping. What does that mean? Basically clipping happens when the volume of the signal coming from your amp is too high and the microphone can't deal with it properly. You notice you are clipping when the meters inside your DAW (or directly in your audio interface) turn red.
Volume is measured in db (decibels), when you go close to (or over) 0 db you can be certain that you are clipping, and that will result in an unpleasant distorted sound.
You can avoid that by turning down the volume knob on your interface and/or inside your DAW (that is the track volume, not the overall master volume), after you’ve done that you can check your meters again and if you’re not clipping you’re good to go and, if you like the overall sound you’re getting, you can start recording!
Anyway, I feel like I have to address the huge elephant in the room: guitar amps are loud! And they have to be in order to sound at their best, there’s no way around it.
Of course there are ways to reduce the wattage of guitar amps, with a consequent volume drop that obviously facilitates the recording process, but still, we’re talking about recording guitar at home.
You might have the chance to record in a basement, or maybe you don’t have neighbors, but if you turn up an amp to recording volume that’s going to be loud, and more often than not…too loud.
There are two different solutions for that, one is a physical solution and the other one ends up being like an hybrid between the old school way and the rig simulation world. You can buy (or build yourself) what’s known as an Isobox, which is a sound insulated “container” for your cabinet.
This is like a tiny sound proof room, with just enough space for your amp and microphone, and if you choose to use this solution you can expect a significant drop in volume.
The other option is using some kind of Load Box, like the Universal Audio OX (https://www.uaudio.com/hardware/ox.html), which acts as a cabinet, mic and room simulator that connects to the speaker output of your amp.
Hardware like this allows you to use your favorite amplifier, potentially turned up to full volume, because you are excluding the actual cabinet from the equation and you are replacing it with a virtual substitute that allows you to control and manipulate all of the parameters involved, including which microphone you want to use, the size of the room where the cabinet is, the speaker and much more. Of course it is all simulated, and because of that this is a completely silent solution if you want it to be.

Until not so long ago amp simulation was bad…like really bad. I remember I used to own a V-Amp 2, an inexpensive little blue piece of hardware with some amp and effect modeling, and it was absolutely impossible to get a decent sound out of it.
You could definitely hear the digital character of this kind of softwares and hardwares, and for the longest time nobody was using this kind of technology at a professional level, because it didn’t sound like the real thing at all, even when the price was “professional”.
That all changed when the Kemper Profiling Amplifier (https://www.kemper-amps.com/profiler/overview) was released in 2011. This revolutionary machine allowed guitar players to “profile” their favorite amps, which would then be stored inside the Kemper and therefore be available to them at all time.
If you want to actually understand how the profiling process works…good luck!
But don’t worry, guitarists are simple people, so I’ll explain it to you in simple terms: you have your amp set as if you wanted to record it in the old school way, then you hook it up to the Kemper and a few bleeps and bloops later (these are literally the sounds it makes) your amp’s “soul” has been captured and replicated inside your profiler.
You can then tweak it to make it sound as close as you can to the real thing and there you go…you have your amp (or amps) with you, everywhere you go, and it’s always going to sound in the same way. MAGIC!
You can imagine what kind of revolution this machine caused in the guitar universe, especially when it comes to the recording process, because all of a sudden you could potentially have all of the amps in the world available at the touch of a button inside one device (you can also buy and download profiles made by other people, in professional studio environments), and they would all sound just like the real thing, with a fraction of the work.
In the years after the Kemper was released there was a massive increase of really good amp simulation solutions available on the market, covering a very wide price range, but first let’s take a step back and divide these products in two categories: software and hardware.

Have you ever heard of Guitar Rig by Native Instruments (https://www.native-instruments.com/en/products/komplete/guitar/guitar-rig-6-pro/) or AmpliTube by IK Multimedia (https://www.ikmultimedia.com/products/amplitube5/)?
These are two of the most well-known amp simulation softwares available, and they will provide you with an immense amount of amps, speakers, pedals and microphones for you to use. You don’t need any additional hardware to use these softwares, you only need the basics: computer, audio interface and obviously…guitar.
Amp simulation softwares are used inside your DAW. First you need to install the program, just like any other regular app, and then you need to follow these steps:
That’s it! You still have to check that you are not clipping, but it’s quite unlikely according to my experience. The cool thing about recording using softwares only is that you can later change the sound you used if you don’t like it anymore, as a matter of fact you could even change software!
If you turn off your simulation plug-in you will be left with your dry guitar sound coming straight from the interface, and that can be quite useful.
One of the biggest downsides in using software amp emulations is that you’re entirely dependent on your computer processing power, so in some cases you might have to stop loading pedals or cabinet simulations if your computer can’t keep up with it.
Also you have to understand that the results you’ll get will be influenced by the combination of your hardware gear and your chosen software, because chances are that they weren't built to work specifically with each other, but in the end all you have to do is experiment and find out what works best for you.
It’s worth saying that some softwares can be paired with dedicated hardware. Universal Audio is a company that makes both great audio interfaces and awesome amp simulation plug-ins, designed to work with each other.
Neural DSP is also another notable company making awesome amp emulation softwares, they have several signature plug-ins available, made in collaboration with some of the best players around.

And now I’ll end this journey with what I think is the best overall solution for recording professional sounding guitar tracks in the comfort of your own personal home studio.
I already mentioned the Kemper, but there’s the Line 6 Helix family (https://line6.com/helix/), the new groundbreaking Neural DSP Quad Cortex (https://neuraldsp.com/quad-cortex), the Fractal range of products (https://www.fractalaudio.com/) and the list goes on.
I’m personally a proud owner of several Line 6 Helix products, but all hardware amp simulators do basically the same thing: everything you’ll ever need.
Sure, some may have better amps, some may excel in effects, while others might have the easiest to learn user interface, but after all I really think that this is where it’s at.
These units are also valuable and usable in a live environment as much as they are in the studio, as a matter of fact most of them are built as pedalboards already, but usually there are table top or rack versions available as well.
Since we are talking about home recording let me run you through the process of using one of these devices to record inside a DAW:
The ease of use is definitely comparable with the software only simulators, but in this case you have software and hardware working seamlessly together, dedicated processing power inside the unit itself and usually a companion editor app you can use on your computer to manipulate every parameter.
It is also worth mentioning that some of these units (like the Helix for example) also work as audio interfaces, so you might not even need to buy a separate one if all you need to do is recording guitar.
Let me answer some of the questions you might have on your mind at this point
Answer: In my opinion you should invest in a good audio interface and a good hardware amp emulator, these are both pieces of gear you can use in a variety of situations and the more you understand them, the more you can get out of them. Obviously if you don’t have a computer I suggest investing in that first.
Answer: If we’re talking about a real amp vs a simulator in a room together, then no…the amp is still the real deal, because of the overall experience you’re gonna get out of it. Anyway, with today's technology, if you compare the sound of a real amp recorded through a microphone with its virtually simulated equivalent I’m confident in saying that even the most experienced guitarist will not be able to tell the difference.
Answer: Theoretically yes, but if you want to get great results you will need to invest in more and more hardware gear, like better microphones, better mic preamps etc…but bear in mind that all of these things are actually included in amp modelers, and I’ll say that once again: you will not be able to tell the difference.
So, I have talked about pretty much all you’re ever going to need for recording guitar at home, with the goal of making you achieve amazing sounding results and awesome guitar tones.
All you have to do is look around and you’ll find everything you need without necessarily breaking the bank. You can read reviews, watch YouTube videos and generally I suggest you try to gather as much information as you can on the gear you want to buy.
Remember that the most important thing is that you find something that suits your needs and that makes your recording experience as smooth as possible, so you can focus on what matters the most: music!
Continue reading related Home Recording comparisons and reviews:
[optin-monster-inline slug="cm0dye3jd2cm5u4sy0cv"]