How to Properly Maintain Your Acoustic Guitar to Build Lasting Love
Guitar Space Team
Guitars can withstand a lot of wear and tear on their bodies, but they are still incredibly delicate instruments. In order to prevent a maintenance problem that could be incredibly costly to you, make sure that you purchase your guitar from a reputable guitar dealer or a musician.
Also, make sure that before you go through with any final purchase, play the guitar a little bit to ensure that it works properly and that it plays well before you go through with the purchase and take it home.
Once you bring your guitar home, maintaining the original sweet sound by properly maintaining your acoustic guitar
A lot of beginning guitarists don’t have a firm grasp on how fickle guitars can be, especially when they don’t take into consideration that the weather can affect the guitar and how prone guitars are to drops.
Some Tips on Why You Should Keep Your Guitar in Good Maintenance
Some guitarists will invest thousands of dollars into equipment, thinking that their equipment is the only thing that they have to worry about. What happens when it’s time for you to play a gig and your action is too low or you’re hearing buzzing from your instrument?
Guitars benefit greatly from proper care from their owner, but can sometimes need a bit of extra attention from a guitar tech or a luthier, as many problems that a guitar can throw at you are too complex for the average Joe to fix on their own without messing up their instrument.
Some Dos and Don't of Fixing Your Guitar
If you’re reading this article to learn how to fix an existing problem with your acoustic guitar, your better bet is to go your local guitar shop or find yourself a luthier to fix your guitar. A lot of inexperienced musicians will attempt to fix a small problem on their guitar, only to end up further damaging their instrument, which costs them more in the long run!
Don’t put yourself in that situation and take your instrument to a professional who will know how to fix your instrument.
The small problem that you’re having with your guitar now could only cost you $50 to fix, but if you try to fix it yourself, you could actually further damage your guitar, which turns the $50 problem into a $500 problem!
You can even damage your guitar so badly that even a professional luthier wouldn’t be able to save it, which means you’ll have to purchase yourself a brand new guitar- yes, guitars are that delicate. While they make look big, boxy, and sturdy, there are pieces of the guitar that are as delicate as glass and will break if mishandled.
If you’re working with a smaller sized company, they may even take the time to show you how you caused the problem, how to prevent the problem again, and how to fix the problem if it happens again (usually the case for smaller sized injuries to your guitar).
You’ll have a professional guiding you through the whole experience, which means that your guitar is in good hands.
However, there are several things that you, as a guitar owner, can do to prevent your guitar from becoming damaged, which means that you’ll help ensure that the sound quality and cosmetic appearance that you’re receiving from your instrument now will be the same for years to come!
How to Preserve Your Guitar Strings
In the long run, guitar strings are one of the more expensive purchases that you make for your guitar, because they’re something that you purchase over and over again. However, there is a way that you could save yourself more money in the long run if you learn how to preserve your guitar strings.
1. Wash Your Hands First.
You’re going to want to wash your hands before you play your instrument. A lot of the dirt, grease, and grime that are on your hands are going to get on your guitar's strings, so in order for you to keep your guitar strings in their best condition, you need to make sure that your hands are clean of dirt and grease before you go and play your guitar.
You can either wash your hands or use hand sanitizer before you play, which will kill off any bacteria that’s in your hands, as well as getting rid of all of the oils that are on your hands that can damage the strings and your instrument over a period of time
2. Wipe Your Strings Down.
Wipe your strings down after you’re done playing your instrument. Even if you took the time to make sure that your hands were clean before playing your guitar, your strings will still get dirty as you go through and play guitar. Take the time to wipe them down with a soft, dry cloth. You can use a dish towel to do this; wrap the cloth gently around one string at a time and move it up and down.
You can use a string cleaner too if you really want to take good care of your strings. If you haven’t been taking good care of your strings (wiping the strings down often) or if they happen to have a lot of dirt and grease on them, you can purchase yourself a string cleaner and a string lubricant at your local music store.
String cleaners aren’t exactly necessary, so if you wipe down your strings every time you play on your guitar, you won't really need it. Don’t ever use commercial all-purpose cleaners on your guitar strings! If your strings happen to have a lot of builds upon them and you haven’t really seen a difference when you’ve taken the time to clean the strings, you may be better of replacing the strings.
Your performance should be the only thing blistering, not your fingertips! This string spray allows for much smoother guitar playing, letting your fingers Glide without friction along the strings.
We earn a commission if you make a purchase, at no additional cost to you.
4. Change Out Your Strings Regularly.
Make sure that you change out your strings regularly, as strings do happen to build up dust and residue over a period of time. The frequency of your string changes depends upon how often you play your guitar. Regardless of how often you play your strings, you should be at least changing them out every couple of months.
Make sure that you don’t take all of your strings off at once because this can cause your guitar to lose its tension over a period of time, which will result in a bent neck that will change the sound of your guitar forever.
Instead of removing all of the strings at once, remove and replace the two lowest strings, and then move on to the next pair. When you go through and replace your strings, make sure that you take your time to clean the frets and the oil on the fretboard.
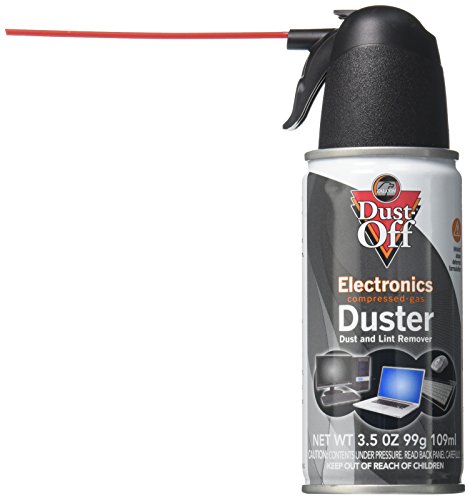
You’re going to want to begin the process of cleaning your guitar by blowing away dust with a can of compressed air spray. You can purchase a can of compressed air from any office supply store or Walmart, as these cans are typically sold to clean computer keyboards, but can also be used to clean between your strings and the body of the guitar, as well as your fretboard.
You’re going to want to use compressed air before you start to clean your guitar with anything else, in order to get the loose particles of dust on the surface of your instrument. This should minimize the work that you have to complete when maintaining your guitar with other cleaning supplies.
We earn a commission if you make a purchase, at no additional cost to you.
02/04/2026 02:05 am GMT
2. Remove the Majority of the Chemicals and Dirt With a Cloth.
Next, you’ll want to take a cloth that’s been dampened with warm water to remove the majority of the chemicals and dirt that has collected on your guitar since its last cleaning. You’re going to want to stay away from using any type of chemical cleaner on your guitar, as the chemicals in the cleaner can damage the finish on your guitar.
When you’re dampening the cloth with water, make sure that you wring the cloth out well before you touch your instrument with that cloth. You’re going to want to make sure that you don’t see any liquid on the surface of your guitar as you’re going through and wiping it off.
It’s also a good habit to practice wiping down your guitar every time you finish playing with it. Keep a microfiber cloth or shammy in your guitar case to wipe your guitar down with, but if you’re looking for a cheaper option, a t-shirt or a cloth diaper will work just as well.
3. Grab an Old Toothbrush to Clean Your Bridge and Frets.
After you’re done working with the shammy, you’ll need to grab an old toothbrush to use to clean out your bridge and your frets. When you’ve decided that the current toothbrush you’re using isn’t good enough to clean your teeth anymore, don’t throw it away! You can give a second life to your toothbrush by using it to clean the grooves in your fretboard, in order to clean out the dirt that collections on both sides of the frets.
A lot of this build-up is from dead skin cells, which means that you will find most of the build-up on the chords that you play the most frequently. Cleaning your fretboard is the easiest to do when you don’t have any strings on your guitar, which allows you to get to your fretboard easier.
Don’t try to brush your strings with the toothbrush, as it can encourage faster wear on your strings. Make sure that your toothbrush isn’t too wet or to spray any water or any other liquid on the surface of your fretboard before you go and clean with your old toothbrush.
4. Condition Your Fretboard.
Once you’re finished cleaning everything, you’re going to need to condition your fretboard. Over a period of time, grime is going to build upon your fretboard, which will make it more difficult to play. After you’ve conditioned your fretboard, wipe your fretboard with lemon oil to protect it from any future damage.
Make sure that you’re not using any general furniture polishes or the same polish that you use for the body of your guitar because the wood on the neck of your guitar is different than the wood on the body of your guitar, which means it needs to be treated differently.
5. Use the Right Cleaner for Your Guitar.
When you’re cleaning the metal parts of your guitar, make sure to grab glass cleaner. If you’re cleaning an electric guitar, chances are that you have a lot more metal parts on your instrument than an acoustic guitar does.
With glass clean, you have the ability to clean off any gunk, grease, or residue on these metal pieces. Get yourself a cloth and spray your glass cleaner on your cloth; make sure that you don’t spray the glass cleaner directly onto your guitar.
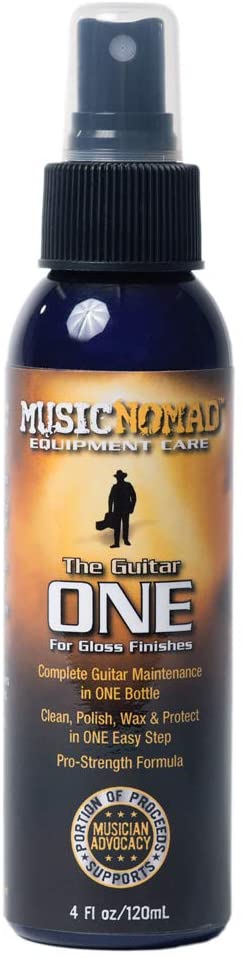
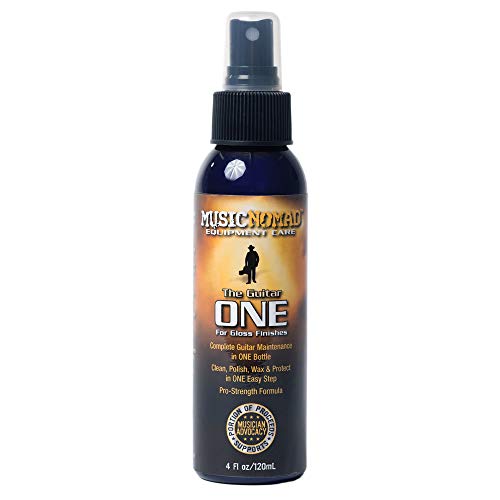
Only use guitar polish when needed. If you feel the need to polish the body of your guitar after cleaning it, only use a polish that has been specifically designed for guitars.
While polishes that are made for guitars only will be on the more expensive side, these polishes won’t damage the finish on your guitar.
Make sure that you’re spraying the polish on the rag first and then wipe down your guitar; do not spray the polish or any other wet substances on your guitar directly.
Also, double-check to make sure that you are using a different cloth to wipe down the body of your guitar than you are using to wipe down your fretboard. You’re going to want to eliminate the possibility of cross contaminations, both from the dirt and grime, as well as the cleaners.
When you’re shopping around for a polish that matches the finish of your guitar. If you happen to have a guitar that has a satin or flat finish, you’re going to buy a different polish than you would for a guitar that has a high gloss finish.
The first one step answer to effortlessly achieving a show perfect shine. An ultra slick, streak free, high shine gloss magnifier, organically formulated to clean, polish, wax and protect for gloss finishes.
Now take this time to scrape off the nut of your guitar. There will most likely be a large build-up of dust and dead skin cells on your guitar’s nut, which will affect your guitar’s playability and sound.
Whenever you go and change out your strings, you should take that opportunity to clean your guitar’s nut before you go ahead and set in the new strings. If you notice that there is dust in the groove where the strings sits on the nut, dental floss does a great job of getting the debris out.
How to Properly Store Your Guitar
Taking care of your guitar when it’s in storage is just as important as cleaning your guitar. Properly storing your guitar when you’re not playing it will help to prevent any damage to your instrument, as well as to help prevent wear and tear on the instrument. Before you put your instrument away for the day, you should:
Tighten Any Loose Screws.
Tighten any loose screws. While you are playing your instrument, all of the vibrations that occurs in your instrument can loosen up the screws and bolts in your guitar. Over time, these loosening screws and bolts have the ability to change the sound of your guitar, as well as how easy it is to play the instrument. Make sure that you have a small guitar tool kit in your guitar case so that you can easily tighten any loose screws when you need to.
Store Your Guitar in the Right Environment.
Make sure that you’re not storing your guitar in a moist environment, as your guitar is comprised of thin wood that can be easily warped, so any kind of humid conditions are not ideal to keep your guitar in. If you happen to live in a humid place, consider keeping your guitar in an area that has a dehumidifier. The ideal place you should want to keep your guitar in is where the relative humidity is between 45% and 55%.
Monitor the Light Conditions as Well.
Also, ensure that you monitor the light and the temperature that your guitar is exposed to. Constant, drastic changes in light and temperature can cause your finish to crack, as well as your finish fading faster. While neither of these things will change the sound of your instrument, it will weaken the wood of your guitar, which makes it easier to damage.
Use Your Set of StrapLocks to Keep the Guitar in Place When Storing.
Use your set of strap locks or buy a pair if you don’t have any. If you are someone who happens to play your guitar using a strap often, a set of strap locks will do wonders when it comes to keeping your guitar looking its best. Strap locks your guitar strap into place so that your guitar doesn’t pop off the trap. Without using strap locks, your guitar could come loose from the strap while you are playing, which could cause you to drop your guitar.
Accidents like this could damage your guitar’s finish or crack your guitar’s body. Strap locks are actually pretty inexpensive, so you can pick them up at any music or guitar store. If you know you’re going to be someone who plays guitar while using straps, you’re better off buying strap locks to use when you’re playing your guitar.
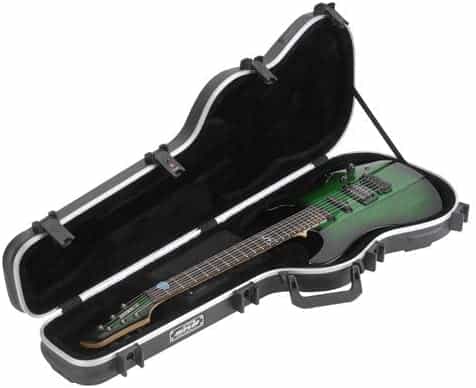
To put it simply, an electric guitar case or gig bag is one of the most important investments you can make as a musician to keep your instrument in its best possible condition. Get on from Guitar Center now!
We earn a commission if you make a purchase, at no additional cost to you.
Once this is all finished, make sure that you keep your guitar in a case. Keeping your guitar in a case (or a gig bag) is the most effective way to keep your instrument safe from any potentially dangerous elements. Even if you have your guitar hanging on a wall or placing it on a stand, there are still opportunities for your guitar to get damaged.
A hard case is the best case that you can store your guitar in to prevent any damage. However, if you don’t happen to have a hard case, a soft case or a gig bag will do a better job than leaving your guitar out and exposed to potential danger.
How Does Humidity Affect My Guitar?
The body of your acoustic guitar is comprised of thin wood, which is easily changed when it’s exposed to inconsistent levels of temperature and humidity. It’s so important to keep your guitar in a consistent level of humidity and temperature that guitar manufacturers, such as Martin, keep their factories at a constant 45%-55% humidity and between 72-77 degrees Fahrenheit.
If your guitar happens to get too far away from either of these numbers, your guitar could be in serious trouble. A rapid increase or decrease in temperature (or any exposure to the cold) can cause small cracks in the finish of your guitar, which are referred to as lacquer checks.
If you’re looking to avoid this problem, you can use a thermometer and a hygrometer combo to measure the humidity and temperature around your guitar.
The higher the humidity is in the room of your guitar, the more your guitar is going to expand and swell, because the moisture content of your instrument is expanding. If you expose your guitar to a gradual increase in humidity, you typically won’t have any permanent damage to your instrument.
If you expose your guitar to a high level of humidity combined with a high temperature for a period of time, you may experience the glue of your bridge to be weakened, which can cause your bridge to pull off of your instrument.
At the end of the day, rapid changes in humidity is what you’re really aiming to protect your guitar from. If you place your guitar near any source of dry heat, the humidity around your instrument will drop a lot faster than it was to leave the guitar alone.
If the moisture tent of wood is forced to minimize in a hurry, pieces of wood are going to shrink faster than other pieces, which will cause cracks and open joints. Don’t leave your instrument next to any source of heat or on a wall where it will dry out.
Take time to ensure that you aren’t leaving your guitar handing on an outside wall during the winter months, as the wall will be cooler than the air outside, which can result in conflicting temperatures of the back of the guitar and the top of the guitar, which can cause them to split apart from each other.
If you happen to leave your guitar exposed to any freezing temperatures, leave it in a room where it can warm up to room temperature while the guitar is still in its case. This allows the wood to come up to room temperature at a more consistent rant, which decreases the chance of any wood cracks or cracks in your finish.
On the other end of the spectrum, extreme caution should be taken if you choose to use a humidifier to fight against low humidity levels, as keeping your instrument in direct contact with moisture could cause your guitar to become damaged.
In order to avoid these situations, we recommend that you store your guitar in its case when you’re not using it. Levels of humidity are a lot easier to control when you leave your instrument in a smaller space.
Don’t loosen up the strings of your instrument when you’re putting it away for the day unless you’re not planning on picking up the instrument for several months. By constantly tightening and loosening your strings, you can quickly ruin their sound and their durability, which may cause them to break easier.
When storing away your instrument, ensure that there isn’t anything storing away underneath the head of the guitar (where the tuning pegs are), as laying your instrument on top of something can damage the body and the neck of the guitar. Store your guitar away as evenly as you possibly can.
How to Adjust the Neck
If you’ve noticed that the neck of your guitar is a little out of alignment, we have some simple steps for you to fix it. Firstly, you’ll want to look down your guitar’s neck from the end of the headstock.
If you see the neck with any bends of dips in it, find the truss rod bolt, which is typically found on the inside of the soundhole, right below the neck of the guitar, and use an Allen key to adjust your neck.
Never, ever force a truss rod if it’s tight, but if it does have some room to adjust it, turn the key clockwise if the neck is dipped (when the neck is lower in the middle than either end). If the neck is over bent (higher in the middle than on either end of the guitar) turn it counter clockwise.
How to Lower the Action on Your Guitar
Before you go through adjusting the action on your guitar, make sure that your neck is correctly adjusted and loosen up the strings to provide you with access to the saddle of the bridge. A lot of acoustic guitars have a thin plastic saddle that connects to the bridge of the guitar. If you have your strings loosened, the saddle can be removed easily.
However, if you’re having problems getting the saddle out of the guitar, carefully use a pair of pliers to pull the saddle out. Examine the saddle for any shims (small pieces of plastic or wood) and re-insert the saddle. Tune your strings back up and check out to see if your action is any lower.
If you’re not happy with the action still, take out your saddle and carefully sand away small parts of the saddle, until the action is up to your standards. You don’t need to sand a lot away for the action to be lowered; if you sand too much of the saddle away, your guitar will rattle and buzz, which isn’t something you want!
How to Get Picks Out of Your Soundhole
All acoustic guitar players know the struggle of getting guitar picks lost inside of your soundhole. At one point in time, I didn’t know how to get my picks out of my acoustic guitar, so I once had 25 guitar picks stuck inside of my guitar! Don’t let yourself fall into the same situation as I did, because getting picks out of your soundhole is super easy.
All you need to do is turn your guitar upside down, so the soundhole is facing the ground. Shake your guitar until all of the picks are out! Just be careful not to hit your guitar on anything.
Conclusion
Taking care of your guitar properly can be tricky, which is why we threw in a quick chart for you to understand the main, most important parts of maintaining your acoustic guitar properly.
Dos
Don’ts
Store your guitar in a case when you’re finished playing
Leave your guitar exposed
Change your strings out every 2-3 months
Wait for your strings to break to put in a new set
Store your guitar in a room with a consistent humidity level and temperature
Leave your guitar in a room that isn’t insulated well
Clean your strings
Go months without cleaning your instrument
Wash your hands before playing
Uses furniture polish on your instrument
Go to a luthier if you’re experiencing problems with your guitar that you can’t fix or don’t understand
Try to fix all of the problems your guitar is having, as this is how you can damage your guitar.
If you ever make a mistake when putting in a new set of strings, accidentally damage your guitar, don’t understand how to adjust your action, take your guitar to your local guitar repair person or to a luthier. It’s better to pay a little bit of money out of pocket than permanently damage a guitar that’ll cost you hundreds or even thousands of dollars to replace!
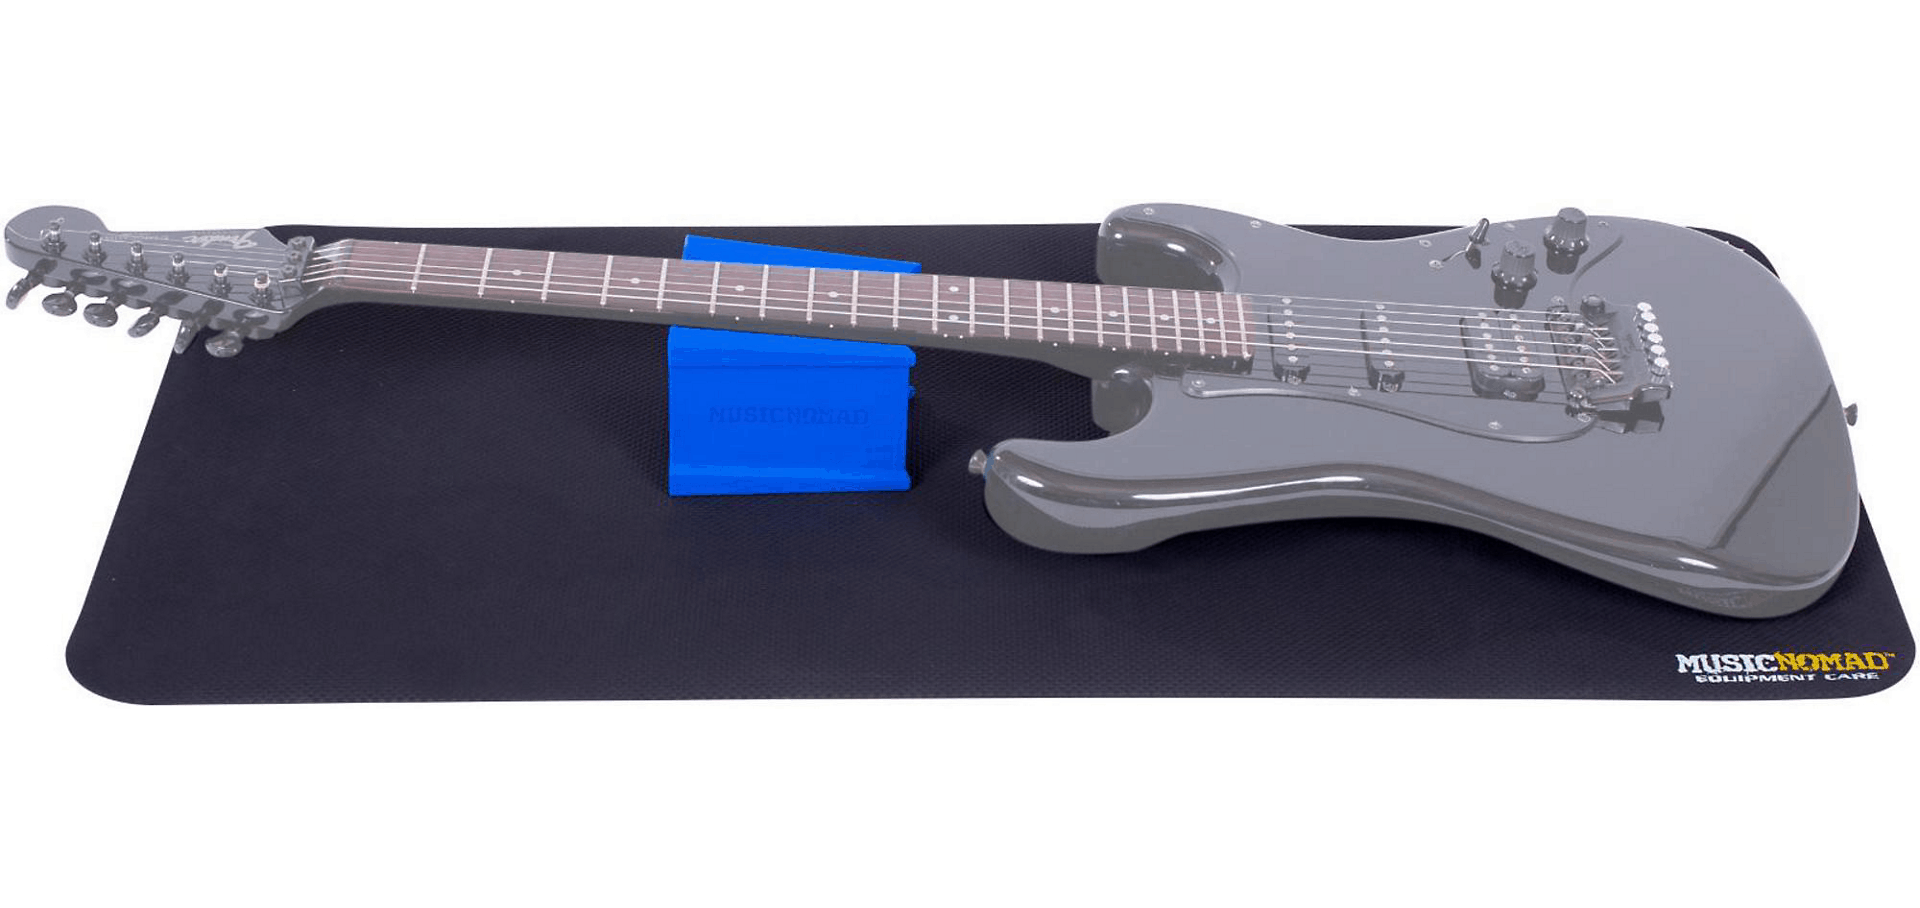
A work mat is an easy way to upgrade your guitar's cleanup and repair process. The neck support helps keep your guitar safe and secure while you're doing repairs or maintenance.
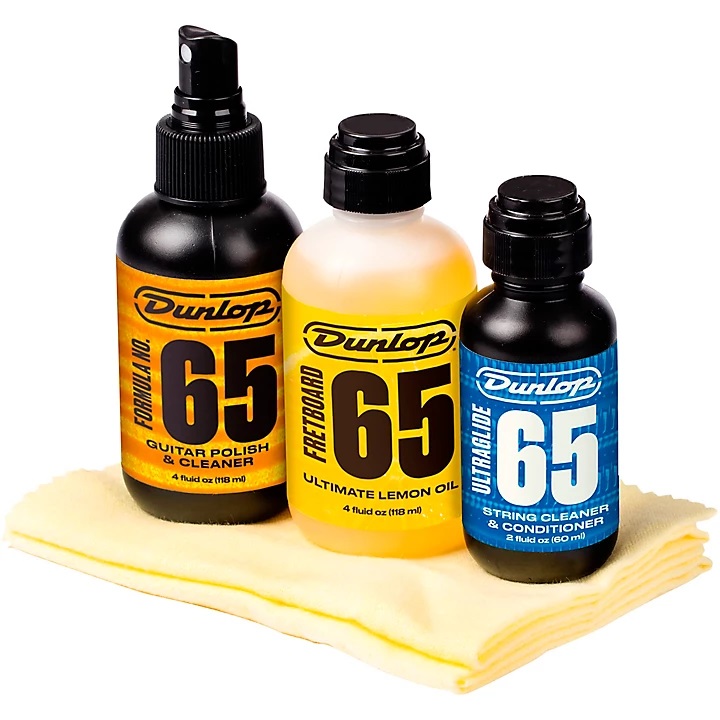
This Dunlop kit includes a Formula 65 Guitar Polish and Cleaner (2 oz.), Fretboard 65 Ultimate Lemon Oil (2 oz.), Ultraglide 65 String Cleaner and Conditioner (2 oz.), a peg winder and 2 polish cloths.
We may receive compensation from the companies whose products we review. We only recommend products that we believe in and test.
Author
Guitar Space Team
The Guitar Space team is a crew of dedicated players. Led by Ed Lozano, working musician, teacher, and author for over four decades. Ed is joined by other bonafide classic players, bringing real-life guitar-playing testers, buyers, and writers to the crew. We'll tell you what you really need, what we'd buy & give you real-deal advice from decades of playing.
Ever hit a G chord that feels bright and settled, then swap to G7, and suddenly it sounds a little…expectant? Like it’s leaning forward, waiting for the next page to turn. That “unsettled” sound is the whole point. G7 is a dominant seventh chord built from G (Root), B (Major 3rd), D (Perfect 5th), and […]
The first time I met B7, my hand froze. Four fingers, tight spacing, and one tiny mistake makes half the chord go dull. That is why I call B7 the Gateway Chord. It pushes your fingers to work as a team. You will hear it in Blues, Folk, Classic Rock, Jazz, and even acoustic metal […]
Hitting that beginner plateau on guitar can feel rough; you sit down to play, pick a song you love, and realize it is way beyond your current skills. That kind of mismatch drains motivation fast. The smarter move is to start with songs that sound great but use simple building blocks like open chords, standard […]