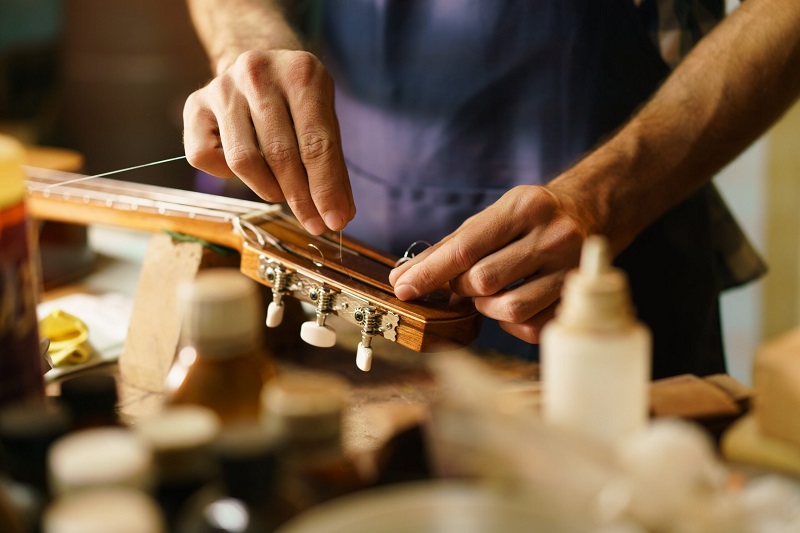
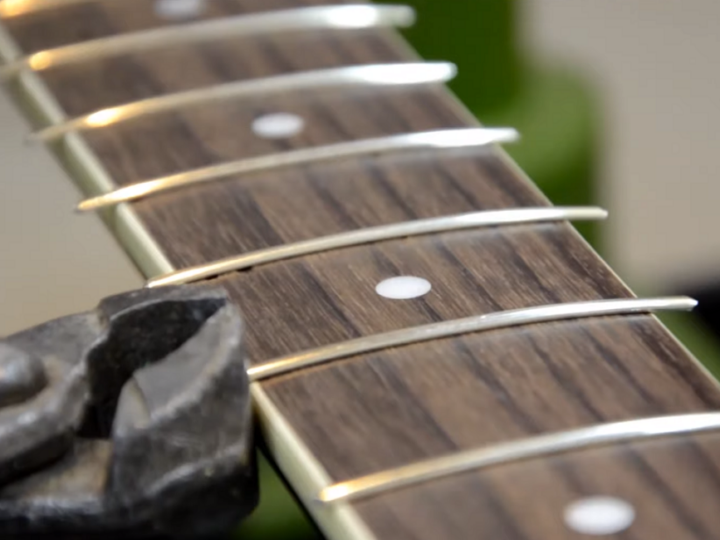
Refretting a guitar is one of those things that sounds quite daunting at first. Like when you take your first steps fixing your bike, your car, or formatting your PC. Similar to these moments, it’s just daunting at first but learning how to refret a guitar can become a handy tool to add to your skillset if you intend to be a casual guitarist or are interested in knowing your instrument a bit better.
In some way, refretting your guitar makes it less of a stranger to you and allows you to have a more in-depth knowledge of how these axes are built and assembled when you go to buy your next one.
When Will I Start to Notice It Needs to Be Refretted?
You will start to notice it in little things. Depending on how uniform the wear and tear on your fretboard is, you’ll notice things like:
- Bending strings is no longer as comfortable as it was before.
- When you press specific notes up and down the fretboard, you’ll get twanging sounds. When it is pretty harsh, sometimes you might find that around the 12th fret and the high E string, you might hear the same note between two different frets. This is because the string will not be resting on its own fret; it will be resting on the next fret. Such a fretting problem…
- Sliding notes up and down the fretboard will become harder; you will often get caught on a fret.
- The overall sound loses richness because the strings pivot on different frets or parts of the fret.
- Overall, the playing experience is just not as comfortable, and harder to make chords, mostly barre chords sound clean.
What Material Is Best for New Frets
There are a number of factors that influence the sound and feel of fret wire. from the width, to the size and shape of the crown (the top part that we actually place our fingers on), or the material.
The most common material used for frets is Nickel Silver (which has no silver in it, despite its name), but there are a few other:
- EVO Gold: This is a more modern addition to fret materials, and it is used mainly for when a player has a certain allergy towards nickel. It uses an alloy of copper and tin. This is slightly less durable than Nickel Silver or Stainless Steel
- Stainless Steel: Stainless steel is the sturdy, long-lasting option of the three. Adjusting them takes forever but they stay as good as new, shiny and slippery as the first day. Ive tried only a handful of these kinds of frets on Jazz guitars mostly.
- Nickel Silver: It will deliver the warmest tone, the most sustain, and is not as slippery as stainless steel. It still is the industry standard by far.
Refretting or Fret Leveling?
Chances are, if your fretboard isn’t that worn down, that fret leveling will keep you going for a while longer without having to resort to the hassle of refretting, which, if you are not too keen on doing yourself, will have to be handled by a professional luthier.
However, fret leveling will often fix most of the issues mentioned above, temporally, until you finally refret your axe. Fret leveling makes sure no frets are higher or lower than the rest, as this will significantly impact our playing, sound, and cleanliness.
By just making sure that the frets are in shape with a file or sanding tool, we can take the higher frets down to equal positions throughout the fretboard. In this video, you can see how easy this actually is, with two pieces of equipment:
Refretting Your Guitar
Material and Tools You Will Need:
- Safety Glasses, very recommended.
- Cyanoacrylate
- Soldering Iron
- A damp cloth
- A calliper
- Small pliers with a flat tip
- A Dremel drill with a small cutting disc
- A file and/or a thin, triangular file
- Sanding paper 235gr, and 300 or 400gr.
- A fingerboard sanding block
- A sharp blade, cutter or similar.
- A radius ruler
- Workspace
Frets. Those heroic metal bars, embedded in the fretboard of the instruments that are exposed daily to wild pulsations and merciless bendings that wear them out.
Tons of rust corrodes them from the grease on our fingers (and eventually other environmental elements, such as dust, beer, nicotine and other such substances). Despite all this, they play a fundamental role in both playing comfort and the instrument’s final tone.
Once we’ve assumed that refretting is the way to go, you’ll need to know a few things in advance: It’s a delicate process. You might not get it perfect the first time, but practice makes perfect.
You will have to purchase some specialized gear and gear up with a lot of patience, working space and some time.
Prepping
The first thing to do is remove the guitar neck from the body if it is bolted. We will work much more comfortable this way. If your mast is glued you will have to wrap and cover the whole body to protect it. We do not want it to be damaged during the process.
Remove the tuners, string guides and nut. We secure the neck with a vice, holding it by the neck socket and with rubber protections to not mark it. We support the blade so that it is firm to work on it, but we are not forcing the neck or deforming it.
On a rosewood fretboard, make sure the wood is hydrated before you start, or removing the frets could cause major splintering. So if you see that the wood is dry, clean it and apply lemon oil as you would in regular maintenance.
If our fretboard is varnished, first of all, we must pass a sharp blade on the joints to free the frets from possible varnish residues.
The Delicate Part
Now we can start to remove the frets. For this, we will need a normal pencil soldering iron, like the one we use for electronics, and some small pliers with a flat tip. These are sold in lutherie tool stores for about 30€.
However, in any hardware store, you can buy almost the same ones for about 5€. The only thing you will have to do is file the head a little to make it completely flat to hold the frets well.
This is one of the most delicate steps. We must pass the tip along the fret with the soldering iron delicately. The main goal is to melt the glue and retract the wood slightly. The idea is to grab the fret with the tongs while we pass the soldering iron, and with very soft movements, we grope until it comes out.
On a varnished maple fretboard, we must be cautious how long we expose the soldering iron to the fret, or we can burn the varnish, producing bubbles or even black spots that will not be removed.
In any case and for the same reason, we must be extremely careful that the tip of the soldering iron touches only the fret and not the wood by an oversight. Concentration in this step is fundamental.
Damage Control
Once we have removed them all, it is time to check the damage. It is usual for tiny pieces of wood to pop out in places. We should keep them and glue them with cyanoacrylate.
If we have a hole or crack in the fretboard for some reason, we can try and repair it. Again, with wood dust and cyanoacrylate. Once this paste dries, it can be sanded, and it will be quite disguised.

Smoothing out the Fretboard
Next, we must confirm that the fingerboard radius is correct and consistent along the entire length of the neck. To do this we will need a radius ruler, which you can buy online or at a hardware store.
If it’s all good, we can go ahead. If not, we will have to sand it to give it the correct radius. In the case of rosewood necks, there is no problem. For varnished maple, we will have to remove the varnish first.
We will need a fingerboard sanding block of the correct size. Putting a sheet of 235 grit, self-adhesive sandpaper on it, we will shape it with forward and backward movements.
It is very important to exert the same force on all points of the block to avoid sanding more on one side than the other and deforming the fingerboard. Check with the ruler every few passes. I emphasize this because I ruined a fretboard this way the first time.
Fingerboard Grooves
Whether or not we have had to correct the radius, the next thing to do is clean the fret grooves of sawdust, wood and glue. We will do this with a blade. It’s easy to slip and scratch the fretboard in this process, so be especially careful.
Next, make sure that the width of the old fret tooth matches the new one you will install. As simple as measuring it with a calliper.
With a triangular file, we smooth the edges of the grooves so that the fret teeth enter without problems. No more than a couple of passes. After this, we go over the grooves again with the blade to clean them thoroughly.
The Frets
It is time to prepare the frets. When buying them, you can find them in several formats: in rolls of several meters (oriented towards manufacturers and professional luthiers) and in pre-cut rods of various sizes, straight or curved.
Although I usually choose the curved ones for convenience, I recommend the straight ones if you will do this often.
You can bend them yourselves to the curvature you need. You will need a fret bender from a good brand to do this. If you have time and a reliable hardware store at hand, you can take a look on Youtube, where you will find several tutorials that explain how to build one.
A very important detail to consider is that the frets that you are going to place must have a radius a little smaller than that of the fingerboard, that is to say, more curvature. If their radius is the same or more prominent, the edges will be slightly raised and poorly seated. The importance of the fret bender is paramount. Be very careful in this aspect.
The first thing to do is clean the rods with a rag soaked in solvent. This will remove any substance that might give us any problem with the glue.
Since each fret has a different length, it is convenient to have a place where to place them in order once we have them cut. Starting with the last of the frets, we measure them. Cut with sharp pliers leaving a few millimetres on each edge.
Installing the New Frets
Once they are all cut and organized, it is time to introduce them into the grooves. Here you have several methods for all budgets. The most popular today are fret presses.
These offer great comfort and regularity because they press equally over the entire length of the fret at the same time. On the other hand, as you can imagine, they are a bit expensive.
There are several versions of the same concept, which also have their own solution. I, however, opt for the method that has been used forever: A hammer with a rubber head. I have never used the press, but I have not had much trouble with the hammer either.
Another thing we will need is a support for the back of the neck that will hold it without marking it when it comes time to cock the frets. It is something as simple as a block of wood with a curved contour.
You can make it yourself with a wood strip or, again, buy it here. Remember also that the workbench’s surface should be as firm as possible. Take advantage of the area just above the table leg to maximize pressure transmission.
With all the preparations done, all that remains is to start inserting the frets. Put one or two small drops of cyanoacrylate on the tooth. With soft blows of the hammer, it is introduced first, at one of the ends. When it is ready, you cock it with not too strong blows until the fret is perfectly seated.
If any of them is badly seated or short at one end, it should be removed and replaced. Never try to cock it from the sides. It is possible that when you remove it, the fret will be deformed, in which case you will have to cut a new one. Any glue stains on the fingerboard should be removed immediately with a damp cloth. Keep one handy at all times.
Finishing Touches
Once all the frets are inserted, it is time to cut the excess ends. We will use a Dremel-type mini drill with a cutting disc. We must do it little by little and with short passes to avoid the fret from overheating.
This could cause the fret to move as the glue melts or even burn the wood. Again, we put protection tape on, to avoid accidents.
With a straight wooden block to which we have placed a sheet of 235 grit self-adhesive sandpaper (the same we have used to give the correct radius to the fingerboard), we will finish off the frets on the sides. After that, the beveling of the same, sanding the edges with an angle of 45 degrees. We deliver the final touches to leave them smooth to the touch with a file.
All that remains is filling the gaps between the fret tooth and the wood. For this, we have two options: use putty or the famous formula of wood powder and cyanoacrylate.
In my personal experience, I must say that the putty is much more comfortable to work with. Once the mixture is dry, fine sandpaper (350 or 400) can give it a perfect finish.
Once this is all done, you will have to do the fret leveling we talked about at the beginning, make sure they’re good to go, and re-string your newly refret guitar!

Partial Refretting
Having explained how to completely refret your guitar, step by step, it would seem adequate to point out that, as I said before since frets do not wear down at the same speed, you can find yourself wanting to change only certain frets and not all of them.
Here is where “partial refretting” comes in handy: Refretting only those frets that have significantly more wear and use than others. In my opinion, if you’re already set to do the job you might as well change them all and not have to do it later on with the others.
However, it is useful to keep that in mind as an option.
FAQ
Question: What are the best frets for guitar?
Answer: The Jumbo or medium Jumbo frets, which are slightly larger, are considered to be harder to get used to but better in the long run, especially for bending and vibratos.
Question: What is the best material for frets?
Answer: Nickel Silver alloy is the material frets made out of generally because of its unique non-absorbent properties. It resists tarnish and won’t become slippery when your fingers get sweaty.
Question: How much does refretting cost?
Answer: Depending on where you live, it can cost as little as 150 and stretch as far as 300-400€. It is generally only done on expensive instruments.
Question: Do frets affect the tone?
Answer: It might not seem so, but it can affect the tone and sustain. More directly, it affects the playability, but the frets and how wide they are can affect the string’s resonance, making it more or less twangy, if that makes sense.
Question: What is fret dressing?
Answer: Fret dressing is the process of “tidying up the frets” and getting them in the best shape for optimal performance. This would include taking care of sanding down the tops of the frets to make sure strings slide over them blissfully, making sure there are no frets sticking over the sides of the fretboard (wood tends to shrink in some weather conditions), leveling all of them out and polishing them off.
Question: How many frets does a beginner guitarist need?
Answer: The standard is 22-24 frets. You’ll only be missing a higher fret count if you are soloing very often and like to play way down the fretboard.
Conclusion
In most cases leveling your frets will suffice to get your guitar back into top-notch playing standard. If you don’t have the right tools, they are not hard at all to find and not all that expensive, considering you’ll have them for life.
If you’re at all curious about learning new ways of fixing and taking care of your guitar, I highly recommend trying to regret your guitar at some point.
There are video tutorials on Youtube if you are nervous about it. Worst comes to worst; you will have to take your guitar to a luthier anyway to fix what you did. They might even be kind enough to give you some tips and show you where you went wrong.
So, technically, nothing bad can come of giving it a try!
- Jimi Hendrix Guitars and Gear: A Comprehensive List - August 10, 2023
- Fender Frontman 212r Review and Guide - August 4, 2023
- How To Clean A Fretboard Properly - July 18, 2023


